
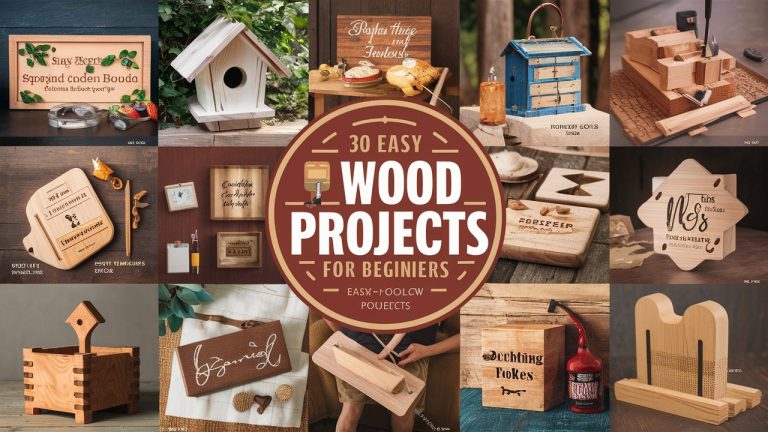
30 Simple Woodworking Projects for Beginners: Kickstart Your DIY Journey
Woodworking feels a lot like magic. You start with plain pieces of wood, and with a few simple moves, you turn them into something you can use and love. When I first started, I remember feeling lost, too. But trust me—once you make your first little project, the confidence hits fast.
Here are some fun and easy beginner projects. Each one teaches you a basic skill, and you get something useful at the end. It’s a nice mix of learning and joy.
1. Simple Bookshelf

A simple bookshelf is a perfect first project. It teaches you how to cut wood, sand it smooth, and put pieces together. And nothing beats seeing your books sit on something you made.
Materials
- Wooden boards
- Screws
- Sandpaper
- Wood stain or paint
Steps
- Cut the boards to the size you want.
- Sand the edges so they feel smooth.
- Screw the frame together.
- Sand the whole piece again.
- Add paint or stain for the final look.
2. Wooden Picture Frame

A picture frame is small, simple, and very satisfying. It helps you practice neat cuts and clean joints.
Materials
- Wood strips
- Glue
- Nails
- Sandpaper
- Paint or varnish
Steps
- Cut the strips to your frame size.
- Glue and nail the corners.
- Sand the frame.
- Paint or varnish it.
3. Birdhouse

A birdhouse is fun to make and even more fun to watch birds use. The steps are very beginner-friendly.
Materials
- Wood pieces
- Nails
- Sandpaper
- Paint

Steps
- Cut the wood for the base, sides, roof, and front.
- Nail everything together.
- Sand the edges.
- Paint it so it lasts longer outside.
4. Wooden Coasters

Wooden coasters are quick to make and great as gifts. They also help you get comfortable with cutting and sanding.
Materials

- Small wood blocks
- Sandpaper
- Wood stain or paint
Steps

- Cut your wood into squares or circles.
- Sand them smooth.
- Stain or paint for a clean finish.
5. Key Holder

Everyone needs a spot for their keys. This project teaches you drilling and simple finishing.
Materials

- Wood plank
- Hooks
- Sandpaper
- Paint or stain
Steps

- Cut the plank to size.
- Drill holes and add hooks.
- Sand the surface.
- Paint or stain the plank.
6. Wall Shelf

A wall shelf is handy and teaches you how to mount things level on a wall.
Materials
- Wooden plank
- Brackets
- Screws
- Sandpaper
- Paint or stain
Steps
- Cut the plank.
- Sand the edges.
- Attach the brackets.
- Mount the shelf.
- Paint or stain.
7. Wooden Planter Box

A planter box looks great on balconies or gardens. It’s simple but feels rewarding.
Materials
- Wooden boards
- Screws or nails
- Sandpaper
- Paint
Steps

- Cut the boards for the box.
- Attach them to shape the planter.
- Sand the edges.
- Add paint for protection.
8. Wooden Bench

A bench is a slightly bigger project but still doable. It’s a great confidence booster.
Materials
- Wooden boards
- Screws
- Sandpaper
- Paint or stain

Steps
- Cut the boards for the seat and legs.
- Attach the legs to the seat.
- Sand everything smooth.
- Paint or stain.
9. Wooden Tray

A wooden tray is simple, cute, and useful for serving drinks or decorating a table.
Materials
- Wood pieces
- Nails or screws
- Sandpaper
- Paint or stain
Steps

- Cut the pieces for the base and sides.
- Attach the sides.
- Sand well.
- Paint or stain.
10. Candle Holder

A candle holder adds a cozy vibe to any room. It’s great for learning how to drill holes cleanly.
Materials
- Wood block
- Drill
- Sandpaper
- Paint or stain

Steps
- Cut the block.
- Drill holes for the candles.
- Sand smooth.
- Paint or stain.
11. Cutting Board

A cutting board is simple but looks impressive. You’ll learn how to make a smooth, food-safe finish.
Materials

- Hardwood plank
- Sandpaper
- Mineral oil
Steps

- Cut the plank.
- Sand until smooth.
- Rub with mineral oil.
12. Wooden Clock

A wooden clock adds personality to any space. It’s a small project with a big impact.
Materials

- Wood plank
- Clock mechanism
- Drill
- Sandpaper
- Paint or stain
Steps
- Cut the plank into your favorite shape.
- Drill a hole for the mechanism.
- Sand the surface.
- Paint or stain.
- Add the clock parts.
13. Coat Rack

A coat rack is simple and stylish. You’ll practice drilling and adding hardware.
Materials

- Wood plank
- Hooks
- Screws
- Sandpaper
- Paint or stain
Steps

- Cut the plank.
- Add hooks.
- Sand the edges.
- Paint or stain.
14. Wooden Spoon

Carving a spoon feels almost meditative. It’s also a great introduction to hand tools.
Materials
- Wood block
- Carving tools
- Sandpaper
Steps

- Draw the spoon shape.
- Carve slowly and safely.
- Sand everything smooth.
15. Jewelry Box

A small jewelry box is such a sweet project. It feels special to build something that holds your favorite items. The cuts are simple, but you’ll learn good control and patience.
Materials Needed:

- Wood pieces
- Hinges
- Screws
- Sandpaper
- Paint or stain
Steps:

- Cut the wood to form the box and lid.
- Attach the pieces with screws and add the hinges.
- Sand the box so it feels smooth to the touch.
- Paint or stain it to match your style.
16. Spice Rack

A spice rack makes your kitchen feel neat in an instant. It’s a small build, but it teaches drilling, cutting, and finishing.
Materials Needed:
- Wood pieces
- Screws
- Sandpaper
- Paint or stain
Steps:

- Cut pieces for the shelves and sides.
- Screw everything together.
- Sand to remove sharp or rough spots.
- Paint or stain to finish.
17. Wooden Desk Organizer

I love this project because it makes your desk look tidy right away. You can adjust the size to fit pens, clips, or even a small notebook.
Materials Needed:

- Wood pieces
- Screws
- Sandpaper
- Paint or stain
Steps:

- Cut the pieces based on the compartments you want.
- Assemble using screws.
- Sand until smooth.
- Paint or stain in your favorite shade.
18. Wooden Crate

A wooden crate brings a rustic vibe to any room. You can use it for blankets, books, or plants.
Materials Needed:
- Wooden boards
- Nails
- Sandpaper
- Paint or stain
Steps:

- Cut the boards to form the sides, ends, and bottom.
- Nail the pieces together.
- Sand the crate so it looks clean and smooth.
- Paint or stain for a nice finish.
19. Wooden Coat Hanger

This is a quick project that adds charm to your entryway. It’s simple, useful, and fun to customize.
Materials Needed:
- Wood plank
- Hooks
- Screws
- Sandpaper
- Paint or stain
Steps:

- Cut the plank to the length you want.
- Drill holes and attach the hooks.
- Sand the surface.
- Paint or stain the plank.
20. Wooden Name Plaque

A name plaque is perfect for a door, shelf, or gift. It’s creative and lets you play with colors and lettering.
Materials Needed:
- Wood plank
- Paint
- Sandpaper
Steps:

- Cut the plank to your chosen size.
- Sand until smooth.
- Paint the name or message.
21. Magazine Rack

A magazine rack gives your living room a clean, cozy feel. It’s simple but stylish.
Materials Needed:
- Wooden boards
- Nails or screws
- Sandpaper
- Paint or stain
Steps:

- Cut boards for the sides, bottom, and divider.
- Attach the pieces with nails or screws.
- Sand the rack.
- Finish with paint or stain.
22. Wooden Napkin Holder

This little project adds a warm touch to your dining table. It’s one of the easiest builds on the list.
Materials Needed:
- Wood pieces
- Nails or screws
- Sandpaper
- Paint or stain
Steps:
- Cut pieces for the base and two side panels.
- Attach with nails or screws.
- Sand well.
- Paint or stain.
23. Tool Caddy

A tool caddy feels like a classic project. It’s great for carrying tools or craft supplies.
Materials Needed:
- Wooden boards
- Nails
- Sandpaper
- Paint or stain
Steps:

- Cut pieces for the base, sides, and handle.
- Nail them together.
- Sand everything.
- Paint or stain.
24. Wooden Stool

A small stool works anywhere in the home. It’s a simple build, but it feels rewarding.
Materials Needed:
- Wooden boards
- Screws
- Sandpaper
- Paint or stain
Steps:

- Cut pieces for the seat and legs.
- Screw the pieces together.
- Sand until smooth.
- Finish with paint or stain.
25. Wooden Wine Rack

This project makes a lovely gift or décor piece. You’ll learn simple joinery as you assemble the rack.
Materials Needed:
- Wooden boards
- Screws
- Sandpaper
- Paint or stain
Steps:

- Cut boards for the sides and dividers.
- Screw them together.
- Sand the whole piece.
- Add paint or stain.
26. Wooden Phone Stand

A phone stand is quick to make and super handy. It’s a perfect beginner project.
Materials Needed:
- Wood pieces
- Sandpaper
- Paint or stain
Steps:

- Cut the pieces for the base and back support.
- Sand well.
- Paint or stain.
27. Wooden Picture Ledge

A picture ledge lets you display art, photos, or books. It’s clean, simple, and looks great on any wall.
Materials Needed:
- Wooden boards
- Screws
- Sandpaper
- Paint or stain
Steps:

- Cut boards for the ledge and back.
- Screw them together.
- Sand the surface.
- Paint or stain.
28. Wooden Toy Box

A toy box helps keep a child’s room neat. The build is simple and sturdy.
Materials Needed:
- Wooden boards
- Screws
- Hinges
- Sandpaper
- Paint or stain
Steps:

- Cut boards for the sides, bottom, and lid.
- Assemble with screws and add the hinges.
- Sand smooth.
- Finish with paint or stain.
29. Wooden Tablet Stand

A tablet stand is great for watching videos or cooking along with recipes. It’s very easy to make.
Materials Needed:
- Wood pieces
- Sandpaper
- Paint or stain
Steps:

- Cut the board for the base and support.
- Sand until smooth.
- Paint or stain.
30. Wooden Utensil Holder

This adds a warm, homemade touch to your kitchen. It’s useful and quick to build.
Materials Needed:
- Wood pieces
- Screws
- Sandpaper
- Paint or stain
Steps:

- Cut the pieces for the base and sides.
- Screw them together.
- Sand to smooth everything out.
- Paint or stain.
Conclusion
Woodworking feels a lot like learning to speak with your hands. Each cut teaches you something new. Each finished piece brings a small rush of joy. These simple projects help you grow at a steady pace. You learn patience. You learn control. And you learn the fun of creating something real.
Start with one small project. Don’t worry about mistakes—they’re part of the story. The more you build, the more confident you feel. Grab your tools, breathe in that fresh wood smell, and enjoy the moment. Your woodworking journey starts with one simple cut.